

基于dlib库人脸特征提取【构建自己的人脸识别数据集】
发布于2019-08-19 17:26 阅读(327) 评论(0) 点赞(1) 收藏(3)
一、安装dlib库
ps.这个步骤不能pip直接安装,需要先下载boosting和cmake搭建环境,再解压安装获得dlib库文件,最后复制关键文件到python安装目录下!
需要下载的文件:
具体安装教程:python3.7添加dlib模块——需要耐心安装注意:
b2 -a –with-python address-model=64 toolset=msvc runtime-link=static
这一句运行时需要删去-with
b2 -a -python address-model=64 toolset=msvc runtime-link=static其他步骤根据教程安装即可!
二、基于dlib库人脸特征提取
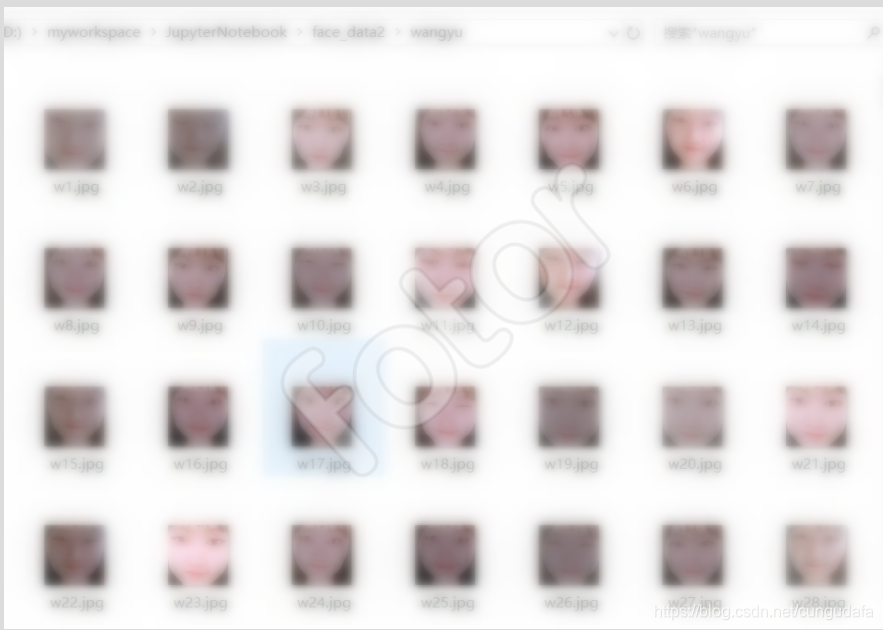
基于dlib库对人脸特征进行提取,在视频流中抓取人脸特征、并保存为64x64大小的图片文件。
注意的是:因为我们后面会对人脸数据集进行训练识别,因此,这一步非常重要。
- 光线——曝光和黑暗图片因手动剔除
- 摄像头的清晰度也比较重要——在哪台笔记本识别,就要在那台笔记本做数据集采集,我用了同学在其他笔记本采取的数据,因为电脑配置,在后面的训练中出现不能识别或错误识别的情况,因此,
尽量同一设备——采取数据集和做人脸识别。 - 我们采用的是视频流截图,也可以用爬虫在百度图片上进行爬取
可以参考我之前的文章:Python网络爬虫(六)关键词搜索百度图片并保存到本地
源码:
import cv2
import dlib
import os
import sys
import random
# 存储位置
output_dir = 'D:/myworkspace/JupyterNotebook/People/person/person1'
size = 64
if not os.path.exists(output_dir):
os.makedirs(output_dir)
# 改变图片的亮度与对比度
def relight(img, light=1, bias=0):
w = img.shape[1]
h = img.shape[0]
#image = []
for i in range(0,w):
for j in range(0,h):
for c in range(3):
tmp = int(img[j,i,c]*light + bias)
if tmp > 255:
tmp = 255
elif tmp < 0:
tmp = 0
img[j,i,c] = tmp
return img
#使用dlib自带的frontal_face_detector作为我们的特征提取器
detector = dlib.get_frontal_face_detector()
# 打开摄像头 参数为输入流,可以为摄像头或视频文件
camera = cv2.VideoCapture(0)
#camera = cv2.VideoCapture('C:/Users/CUNGU/Videos/Captures/wang.mp4')
index = 1
while True:
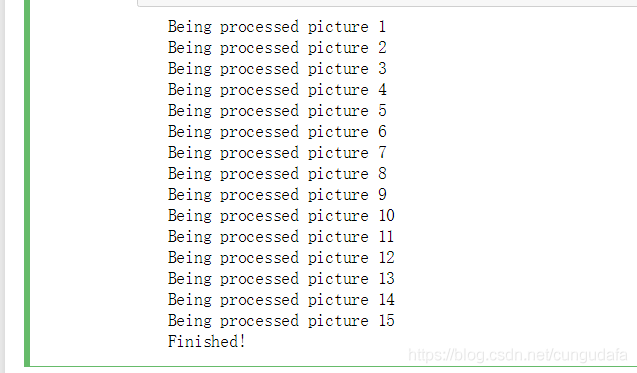
if (index <= 15):#存储15张人脸特征图像
print('Being processed picture %s' % index)
# 从摄像头读取照片
success, img = camera.read()
# 转为灰度图片
gray_img = cv2.cvtColor(img, cv2.COLOR_BGR2GRAY)
# 使用detector进行人脸检测
dets = detector(gray_img, 1)
for i, d in enumerate(dets):
x1 = d.top() if d.top() > 0 else 0
y1 = d.bottom() if d.bottom() > 0 else 0
x2 = d.left() if d.left() > 0 else 0
y2 = d.right() if d.right() > 0 else 0
face = img[x1:y1,x2:y2]
# 调整图片的对比度与亮度, 对比度与亮度值都取随机数,这样能增加样本的多样性
face = relight(face, random.uniform(0.5, 1.5), random.randint(-50, 50))
face = cv2.resize(face, (size,size))
cv2.imshow('image', face)
cv2.imwrite(output_dir+'/'+str(index)+'.jpg', face)
index += 1
key = cv2.waitKey(30) & 0xff
if key == 27:
break
else:
print('Finished!')
# 释放摄像头 release camera
camera.release()
# 删除建立的窗口 delete all the windows
cv2.destroyAllWindows()
break
- 1
- 2
- 3
- 4
- 5
- 6
- 7
- 8
- 9
- 10
- 11
- 12
- 13
- 14
- 15
- 16
- 17
- 18
- 19
- 20
- 21
- 22
- 23
- 24
- 25
- 26
- 27
- 28
- 29
- 30
- 31
- 32
- 33
- 34
- 35
- 36
- 37
- 38
- 39
- 40
- 41
- 42
- 43
- 44
- 45
- 46
- 47
- 48
- 49
- 50
- 51
- 52
- 53
- 54
- 55
- 56
- 57
- 58
- 59
- 60
- 61
- 62
- 63
- 64
- 65
- 66
- 67
- 68
- 69
- 70
- 71
- 72
- python3.7+anaconda3+JupyterNotebook运行效果:
所属网站分类: 技术文章 > 博客
作者:343ueru
链接:https://www.pythonheidong.com/blog/article/48864/ceb6ea9bf3b9cff3c538/
来源:python黑洞网
任何形式的转载都请注明出处,如有侵权 一经发现 必将追究其法律责任
昵称:
评论内容:(最多支持255个字符)
---无人问津也好,技不如人也罢,你都要试着安静下来,去做自己该做的事,而不是让内心的烦躁、焦虑,坏掉你本来就不多的热情和定力