

深度学习用于计算机视觉(1)
发布于2019-08-22 16:27 阅读(1201) 评论(0) 点赞(25) 收藏(4)
深度学习用于计算机视觉从零开始使用GPU训练模型
import tensorflow as tf
from keras import layers
from keras import models
import numpy as np
import matplotlib.pyplot as plt
- 1
- 2
- 3
- 4
- 5
Using TensorFlow backend.
- 1
使用GPU加速训练
import os
from tensorflow.python.client import device_lib
os.environ["TF_CPP_MIN_LOG_LEVEL"] = "99"

if __name__ == "__main__":
    print(device_lib.list_local_devices())
- 1
- 2
- 3
- 4
- 5
- 6
[name: "/device:CPU:0"
device_type: "CPU"
memory_limit: 268435456
locality {
}
incarnation: 10969254508978968812
, name: "/device:GPU:0"
device_type: "GPU"
memory_limit: 3156659404
locality {
  bus_id: 1
  links {
  }
}
incarnation: 17995621738846306774
physical_device_desc: "device: 0, name: GeForce GTX 1050 Ti, pci bus id: 0000:01:00.0, compute capability: 6.1"
]
- 1
- 2
- 3
- 4
- 5
- 6
- 7
- 8
- 9
- 10
- 11
- 12
- 13
- 14
- 15
- 16
- 17
1、使用卷积神经网络训练MNIST模型
from keras.datasets import mnist
from keras.utils import to_categorical
#(train_images, train_labels), (test_images, test_labels) = mnist.load_data()

def load_data(filename):
    f = np.load('mnist.npz')
    return (f['x_train'], f['y_train']), (f['x_test'], f['y_test'])

(train_images, train_labels), (test_images, test_labels) = load_data('mnist.npz')
train_images = train_images.reshape((60000,28,28,1))
train_images = train_images.astype('float32')/255
train_labels = to_categorical(train_labels)

test_images = test_images.reshape((10000,28,28,1))
test_images = test_images.astype('float32')/255
test_labels = to_categorical(test_labels)

# 搭建模型
model = models.Sequential()
model.add(layers.Conv2D(32,(3,3), activation='relu', input_shape=(28,28,1))) ##(3*3+1)*32=320
model.add(layers.MaxPool2D((2,2)))

model.add(layers.Conv2D(64, (3,3), activation='relu'))  ## 3*3*32*64+64
model.add(layers.MaxPool2D((2, 2)))

model.add(layers.Conv2D(64, (3,3), activation='relu')) ## 3*3*64*64+64
model.add(layers.Flatten())

model.add(layers.Dense(64, activation='relu'))
model.add(layers.Dense(10,activation='softmax')) ## 64*10 +10


#编译模型
model.compile(optimizer='rmsprop',
             loss='categorical_crossentropy',
             metrics=['accuracy'])

#训练模型
model.fit(train_images, train_labels, epochs=5, batch_size=64)
- 1
- 2
- 3
- 4
- 5
- 6
- 7
- 8
- 9
- 10
- 11
- 12
- 13
- 14
- 15
- 16
- 17
- 18
- 19
- 20
- 21
- 22
- 23
- 24
- 25
- 26
- 27
- 28
- 29
- 30
- 31
- 32
- 33
- 34
- 35
- 36
- 37
- 38
- 39
Epoch 1/5
60000/60000 [==============================] - 15s 245us/step - loss: 0.1650 - acc: 0.9486
Epoch 2/5
60000/60000 [==============================] - 7s 125us/step - loss: 0.0476 - acc: 0.9853
Epoch 3/5
60000/60000 [==============================] - 7s 123us/step - loss: 0.0335 - acc: 0.9899
Epoch 4/5
60000/60000 [==============================] - 8s 139us/step - loss: 0.0256 - acc: 0.9924
Epoch 5/5
60000/60000 [==============================] - 7s 119us/step - loss: 0.0198 - acc: 0.9938


<keras.callbacks.History at 0x236f33f2d68>
- 1
- 2
- 3
- 4
- 5
- 6
- 7
- 8
- 9
- 10
- 11
- 12
- 13
- 14
- 15
- 16
model.summary()
- 1
_________________________________________________________________
Layer (type)                 Output Shape              Param #
=================================================================
conv2d_1 (Conv2D)            (None, 26, 26, 32)        320
_________________________________________________________________
max_pooling2d_1 (MaxPooling2 (None, 13, 13, 32)        0
_________________________________________________________________
conv2d_2 (Conv2D)            (None, 11, 11, 64)        18496
_________________________________________________________________
max_pooling2d_2 (MaxPooling2 (None, 5, 5, 64)          0
_________________________________________________________________
conv2d_3 (Conv2D)            (None, 3, 3, 64)          36928
_________________________________________________________________
flatten_1 (Flatten)          (None, 576)               0
_________________________________________________________________
dense_1 (Dense)              (None, 64)                36928
_________________________________________________________________
dense_2 (Dense)              (None, 10)                650
=================================================================
Total params: 93,322
Trainable params: 93,322
Non-trainable params: 0
_________________________________________________________________
- 1
- 2
- 3
- 4
- 5
- 6
- 7
- 8
- 9
- 10
- 11
- 12
- 13
- 14
- 15
- 16
- 17
- 18
- 19
- 20
- 21
- 22
- 23
test_loss, test_acc = model.evaluate(test_images, test_labels)
print(test_loss, '   ', test_acc)
- 1
- 2
10000/10000 [==============================] - 1s 85us/step
0.029478431314995213     0.9922
- 1
- 2
2、从头开始训练一个猫狗分类器
1、准备数据
import os , shutil

train_dir = r"F:\Data_Set\train_dir"
validation_dir = r"F:\Data_Set\validation_dir"
test_dir = r"F:\Data_Set\test_dir"

train_cats_dir = r"F:\Data_Set\train_dir\train_cats_dir"
train_dogs_dir = r"F:\Data_Set\train_dir\train_dogs_dir"

validation_cats_dir = r"F:\Data_Set\validation_dir\validation_cats_dir"
validation_dogs_dir = r"F:\Data_Set\validation_dir\validation_dogs_dir"

test_cats_dir = r"F:\Data_Set\test_dir\test_cats_dir"
test_dogs_dir = r"F:\Data_Set\test_dir\test_dogs_dir"

# 查看各个文件夹内的文件数量
print("猫的训练样本总共有:{}张图像".format(len(os.listdir(train_cats_dir))))
print("狗的训练样本总共有:{}张图像".format(len(os.listdir(train_dogs_dir))))
print("猫的验证样本总共有:{}张图像".format(len(os.listdir(validation_cats_dir))))
print("狗的验证样本总共有:{}张图像".format(len(os.listdir(validation_cats_dir))))
print("猫的测试样本总共有:{}张图像".format(len(os.listdir(test_cats_dir))))
print("狗的测试样本总共有:{}张图像".format(len(os.listdir(test_cats_dir))))
- 1
- 2
- 3
- 4
- 5
- 6
- 7
- 8
- 9
- 10
- 11
- 12
- 13
- 14
- 15
- 16
- 17
- 18
- 19
- 20
- 21
- 22
猫的训练样本总共有:1000张图像
狗的训练样本总共有:1000张图像
猫的验证样本总共有:500张图像
狗的验证样本总共有:500张图像
猫的测试样本总共有:500张图像
狗的测试样本总共有:500张图像
- 1
- 2
- 3
- 4
- 5
- 6
2、构建模型
model = models.Sequential()
model.add(layers.Conv2D(32, (3, 3), activation='relu', input_shape=(150, 150, 3)))#3*3*32*3+32
model.add(layers.MaxPooling2D((2,2)))

model.add(layers.Conv2D(64,(3,3), activation='relu'))#3*3*64*32+64
model.add(layers.MaxPooling2D((2,2)))

model.add(layers.Conv2D(128, (3,3), activation='relu'))
model.add(layers.MaxPooling2D((2,2)))

model.add(layers.Conv2D(128, (3,3), activation='relu'))
model.add(layers.MaxPooling2D((2,2)))

model.add(layers.Flatten())
model.add(layers.Dense(512, activation='relu'))
model.add(layers.Dense(1, activation='sigmoid'))

model.summary()
- 1
- 2
- 3
- 4
- 5
- 6
- 7
- 8
- 9
- 10
- 11
- 12
- 13
- 14
- 15
- 16
- 17
- 18
_________________________________________________________________
Layer (type)                 Output Shape              Param #
=================================================================
conv2d_9 (Conv2D)            (None, 148, 148, 32)      896
_________________________________________________________________
max_pooling2d_9 (MaxPooling2 (None, 74, 74, 32)        0
_________________________________________________________________
conv2d_10 (Conv2D)           (None, 72, 72, 64)        18496
_________________________________________________________________
max_pooling2d_10 (MaxPooling (None, 36, 36, 64)        0
_________________________________________________________________
conv2d_11 (Conv2D)           (None, 34, 34, 128)       73856
_________________________________________________________________
max_pooling2d_11 (MaxPooling (None, 17, 17, 128)       0
_________________________________________________________________
conv2d_12 (Conv2D)           (None, 15, 15, 128)       147584
_________________________________________________________________
max_pooling2d_12 (MaxPooling (None, 7, 7, 128)         0
_________________________________________________________________
flatten_3 (Flatten)          (None, 6272)              0
_________________________________________________________________
dense_5 (Dense)              (None, 512)               3211776
_________________________________________________________________
dense_6 (Dense)              (None, 1)                 513
=================================================================
Total params: 3,453,121
Trainable params: 3,453,121
Non-trainable params: 0
_________________________________________________________________
- 1
- 2
- 3
- 4
- 5
- 6
- 7
- 8
- 9
- 10
- 11
- 12
- 13
- 14
- 15
- 16
- 17
- 18
- 19
- 20
- 21
- 22
- 23
- 24
- 25
- 26
- 27
- 28
- 29
3、模型编译
from keras import optimizers
model.compile(optimizer=optimizers.RMSprop(lr=1e-4),
             loss='binary_crossentropy',
             metrics=['acc'])
- 1
- 2
- 3
- 4
4、数据预处理
- 数据是以JPEG文件格式保存在硬盘中,所以需要将数据预处理,主要步骤如下:
- 读取图像文件
- 将JPEG的文件编码解码为RGB像素网格
- 将这些像素网格转化为浮点数张量
- 将0-255的像素值压缩到0-1的区间
- 上述步骤可以使用keras自带的图像预处理工具完成
from keras.preprocessing.image import ImageDataGenerator

train_datagen = ImageDataGenerator(rescale=1./255)#将所有图像像素值缩放
test_datagen = ImageDataGenerator(rescale=1./255)

train_generator = train_datagen.flow_from_directory(train_dir,
                                                   target_size=(150,150),#将目标文件调整为150*150
                                                   batch_size=20,
                                                   class_mode='binary')
validation_generator = test_datagen.flow_from_directory(validation_dir,
                                                       target_size=(150,150),
                                                       batch_size=20,
                                                       class_mode='binary')
- 1
- 2
- 3
- 4
- 5
- 6
- 7
- 8
- 9
- 10
- 11
- 12
- 13
Found 2000 images belonging to 2 classes.
Found 1000 images belonging to 2 classes.
- 1
- 2
#查看一下生成器的结果
for data_batch, labels_batch in train_generator:
    print("data batch shape: ", data_batch.shape)
    print('labels batch shape: ', labels_batch.shape)
    break
- 1
- 2
- 3
- 4
- 5
data batch shape:  (20, 150, 150, 3)
labels batch shape:  (20,)
- 1
- 2
5、训练模型
- 使用fit_generator()方法来训练
history = model.fit_generator(train_generator,
                             steps_per_epoch=100,
                             epochs=20,
                             validation_data=validation_generator,
                             validation_steps=50)
- 1
- 2
- 3
- 4
- 5
Epoch 1/20
100/100 [==============================] - 8s 85ms/step - loss: 0.6895 - acc: 0.5405 - val_loss: 0.6759 - val_acc: 0.5220
 .
 .
 .
Epoch 18/20
100/100 [==============================] - 8s 80ms/step - loss: 0.2282 - acc: 0.9120 - val_loss: 0.6205 - val_acc: 0.7240
Epoch 19/20
100/100 [==============================] - 9s 89ms/step - loss: 0.2059 - acc: 0.9165 - val_loss: 0.7097 - val_acc: 0.7170
Epoch 20/20
100/100 [==============================] - 8s 80ms/step - loss: 0.1814 - acc: 0.9370 - val_loss: 0.6499 - val_acc: 0.7400
- 1
- 2
- 3
- 4
- 5
- 6
- 7
- 8
- 9
- 10
- 11
# 保存模型
model.save_weights("./model_weights/cats_and_dogs_small_1.h5")
- 1
- 2
6、绘制训练过程中的损失和精度曲线
acc = history.history['acc']
val_acc =  history.history['val_acc']
loss = history.history['loss']
val_loss = history.history['val_loss']

epoches = range(1, len(acc) + 1)

plt.plot(epoches, acc, 'b-', label='Training acc')
plt.plot(epoches, val_acc, 'r--',label='Validation acc')
plt.title("Training and validation accuracy")
plt.legend()
plt.savefig('./Result_imgs/Training and validation accuracy_1')
plt.show()
- 1
- 2
- 3
- 4
- 5
- 6
- 7
- 8
- 9
- 10
- 11
- 12
- 13

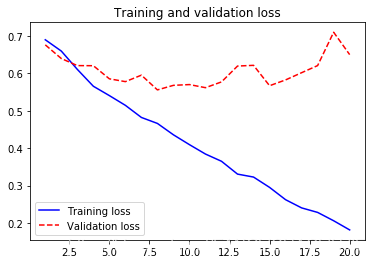
plt.plot(epoches, loss, 'b-', label='Training loss')
plt.plot(epoches, val_loss, 'r--',label='Validation loss')
plt.title("Training and validation loss")
plt.legend()
plt.savefig('./Result_imgs/Training and validation loss_1')
plt.show()
- 1
- 2
- 3
- 4
- 5
- 6
val_acc[15]
- 1
0.7390000033378601
- 1
- 从上图中可以看出,大概在第5轮迭代开始便产生了过拟合。原因之一便是训练的数据太少了
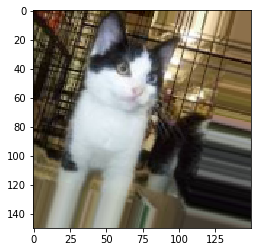
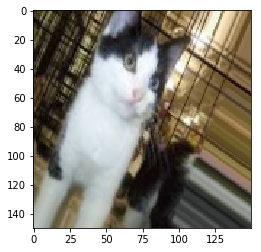
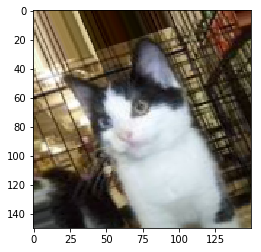
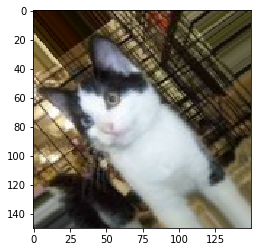
7、使用数据增强技术
datagen = ImageDataGenerator(rotation_range=40,
                             width_shift_range=0.2,
                             height_shift_range=0.2,
                             shear_range=0.2,
                             zoom_range=0.2,
                             horizontal_flip=True,
                             fill_mode= 'nearest'
                            )

from keras.preprocessing import image
fnames = [os.path.join(train_cats_dir, fname) for fname in os.listdir(train_cats_dir)]
img_path = fnames[3]
img = image.load_img(img_path, target_size=(150,150)) #读取图像并调整大小
x = image.img_to_array(img)
print(x.shape)
x = x.reshape((1,)+x.shape)# 将其转变为(1,150,150,3)
print(x.shape)

i = 0
for batch in datagen.flow(x, batch_size=1):
    plt.figure(i)
    imgplot = plt.imshow(image.array_to_img(batch[0]))
    plt.savefig('./Result_imgs/image augmentation_{}'.format(i))
    i += 1
    if i % 4 ==0:
        break

plt.show()
- 1
- 2
- 3
- 4
- 5
- 6
- 7
- 8
- 9
- 10
- 11
- 12
- 13
- 14
- 15
- 16
- 17
- 18
- 19
- 20
- 21
- 22
- 23
- 24
- 25
- 26
- 27
- 28
(150, 150, 3)
(1, 150, 150, 3)
- 1
- 2
8、使用dropout技术
#重新定义一个包含dropout的模型

model = models.Sequential()
model.add(layers.Conv2D(32, (3, 3), activation='relu', input_shape=(150, 150, 3)))#3*3*32*3+32
model.add(layers.MaxPooling2D((2,2)))

model.add(layers.Conv2D(64,(3,3), activation='relu'))#3*3*64*32+64
model.add(layers.MaxPooling2D((2,2)))

model.add(layers.Conv2D(128, (3,3), activation='relu'))
model.add(layers.MaxPooling2D((2,2)))

model.add(layers.Conv2D(128, (3,3), activation='relu'))
model.add(layers.MaxPooling2D((2,2)))

model.add(layers.Flatten())
model.add(layers.Dropout(0.5))#####################################

model.add(layers.Dense(512, activation='relu'))
model.add(layers.Dense(1, activation='sigmoid'))

#编译模型
model.compile(optimizer=optimizers.RMSprop(lr=1e-4),
             loss='binary_crossentropy',
             metrics=['acc'])


#准备数据,使用数据增强生成器
# 对训练数据增强
datagen = ImageDataGenerator(rotation_range=40,
                             rescale=1./255,
                             width_shift_range=0.2,
                             height_shift_range=0.2,
                             shear_range=0.2,
                             zoom_range=0.2,
                             horizontal_flip=True,
                             fill_mode= 'nearest'
                            )


test_datagen = ImageDataGenerator(rescale=1./255)## 不可以对测试数据增强

train_generator = train_datagen.flow_from_directory(train_dir,
                                                   target_size=(150,150),#将目标文件调整为150*150
                                                   batch_size=32,
                                                   class_mode='binary')
validation_generator = test_datagen.flow_from_directory(validation_dir,
                                                       target_size=(150,150),
                                                       batch_size=32,
                                                       class_mode='binary')
history = model.fit_generator(train_generator,
                             steps_per_epoch=100,
                             epochs=100,
                             validation_data=validation_generator,
                             validation_steps=50)
- 1
- 2
- 3
- 4
- 5
- 6
- 7
- 8
- 9
- 10
- 11
- 12
- 13
- 14
- 15
- 16
- 17
- 18
- 19
- 20
- 21
- 22
- 23
- 24
- 25
- 26
- 27
- 28
- 29
- 30
- 31
- 32
- 33
- 34
- 35
- 36
- 37
- 38
- 39
- 40
- 41
- 42
- 43
- 44
- 45
- 46
- 47
- 48
- 49
- 50
- 51
- 52
- 53
- 54
- 55
Found 2000 images belonging to 2 classes.
Found 1000 images belonging to 2 classes.
Epoch 1/100
100/100 [==============================] - 12s 117ms/step - loss: 0.6922 - acc: 0.5328 - val_loss: 0.6781 - val_acc: 0.6150
Epoch 2/100
100/100 [==============================] - 11s 105ms/step - loss: 0.6627 - acc: 0.6053 - val_loss: 0.6445 - val_acc: 0.6250
.
.
.
Epoch 99/100
100/100 [==============================] - 11s 114ms/step - loss: 0.0202 - acc: 0.9928 - val_loss: 1.2302 - val_acc: 0.7670
Epoch 100/100
100/100 [==============================] - 11s 111ms/step - loss: 0.0166 - acc: 0.9947 - val_loss: 1.3127 - val_acc: 0.7780
- 1
- 2
- 3
- 4
- 5
- 6
- 7
- 8
- 9
- 10
- 11
- 12
- 13
model.save("./model_weights/cats_and_dogs_samll_2.h5")
- 1
acc = history.history['acc']
val_acc =  history.history['val_acc']
loss = history.history['loss']
val_loss = history.history['val_loss']

epoches = range(1, len(acc) + 1)

plt.plot(epoches, acc, 'b-', label='Training acc')
plt.plot(epoches, val_acc, 'r--',label='Validation acc')
plt.title("Training and validation accuracy")
plt.legend()
plt.savefig('./Result_imgs/Training and validation accuracy_2')
plt.show()
- 1
- 2
- 3
- 4
- 5
- 6
- 7
- 8
- 9
- 10
- 11
- 12
- 13

plt.plot(epoches, loss, 'b-', label='Training loss')
plt.plot(epoches, val_loss, 'r--',label='Validation loss')
plt.title("Training and validation loss")
plt.legend()
plt.savefig('./Result_imgs/Training and validation loss_2')
plt.show()
- 1
- 2
- 3
- 4
- 5
- 6

- 可见模型在20次迭代后产生了过拟合,性能从 【0.73】提升到了【0.76】左右
所属网站分类: 技术文章 > 博客
作者:8778787
链接:https://www.pythonheidong.com/blog/article/52896/365d47c2c63797a2d5c2/
来源:python黑洞网
任何形式的转载都请注明出处,如有侵权 一经发现 必将追究其法律责任
昵称:
评论内容:(最多支持255个字符)
---无人问津也好,技不如人也罢,你都要试着安静下来,去做自己该做的事,而不是让内心的烦躁、焦虑,坏掉你本来就不多的热情和定力